
Best Books on Server Management to Buy in June 2026

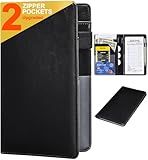
Forvencer Server Book, 2 Zipper Pocket, Server Books for Waitress, Waitress Book for Servers, Fits Waitress Apron, Guest Book, Waitress Accessories, Serving Book,Receipt Holder, Black
-
SECURE ZIPPER POCKETS: KEEP CASH, COINS, & RECEIPTS ORGANIZED AND SAFE.
-
SMART DESIGN: 8 COMPARTMENTS FOR QUICK ACCESS TO ESSENTIALS WHILE SERVING.
-
DURABLE & EASY CARE: HIGH-QUALITY, WATERPROOF PU LEATHER FOR LONG-LASTING USE.


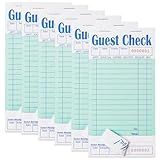
ZPARIK 6 Pack Guest Checks Books for Servers Server Note Pads, Waiter Checkbook, Waitress Notepad for Restaurants, Paper Checks 50 Sheets/Pack, 300 Total Tickets
-
BOOST EFFICIENCY: TEAR-FREE DESIGN FOR QUICK AND EASY ORDER MANAGEMENT.
-
ORGANIZED RECORDS: UNIQUE SERIAL NUMBERS FOR ACCURATE TRACKING AND NOTES.
-
HIGH QUALITY: DURABLE PADS WITH CLEAR PRINT FOR EFFORTLESS WRITING ANYWHERE.
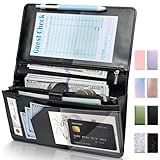
Forvencer Server Book High Volume, Expandable Waitress Book with 2 Zipper & Magnetic Pocket,5"×9", Server Books for Waitresses, Waitress Accessories, Fits Restaurant Check, Waitress Apron (Black)
- DUAL ZIPPER AND MAGNETIC POCKETS FOR SECURE, ORGANIZED STORAGE.
- TEN COMPARTMENTS FOR QUICK ACCESS TO CASH, TICKETS, AND CARDS.
- DURABLE, WATERPROOF PU LEATHER-EASY TO CLEAN AND MAINTAIN!
Server Books for Waitress - Leather Waiter Book Server Wallet with Zipper Pocket, Cute Waitstaff Organizer with Money Pocket Fit Waitress Apron(Classic Black)
-
QUALITY ASSURANCE: EACH PRODUCT IS INSPECTED AND GUARANTEED DEFECT-FREE.
-
VERSATILE ORGANIZATION: MULTI-COMPARTMENTS FOR EFFORTLESS ITEM MANAGEMENT.
-
HANDCRAFTED ELEGANCE: EXQUISITE, DURABLE WORKMANSHIP IN EVERY HANDMADE PIECE.
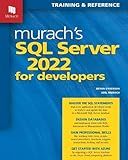
Murach's SQL Server 2022 for Developers

Server Book with Zipper Pocket and Magnetic Closure Server Booklet Waitress Books Serving Book with Money Pocket Waitstaff Organizer Fit Server Apron Waiter Book Wallet High Volume Pocket
- MAGNETIC POCKET SECURELY HOLDS CASH, COINS, AND NOTES STYLISHLY.
- ALL-IN-ONE DESIGN KEEPS CASH, CARDS, AND TOOLS ORGANIZED EFFORTLESSLY.
- DURABLE, LIGHTWEIGHT PU LEATHER OFFERS A PREMIUM LOOK AND FEEL.

Server Book for Waitress Book with Zipper Pocket, 5x9 Leopard Magnetic Closure Server Wallet with Money Pocket and Zipper Pouch, Restaurant Waitstaff Organizer Fit Server Apron
-
8 VERSATILE POCKETS: KEEP ESSENTIALS ORGANIZED AND SECURE!
-
DURABLE PU LEATHER: STYLISH, WATER-RESISTANT, AND LONG-LASTING!
-
COMPACT SIZE: FITS MOST APRONS, IDEAL FOR SERVERS ON THE GO!

Server Books for Waitress, Faux Leather Server Book with Zipper Pocket, Cute Serving Book with Pen Holder Fits Servers Apron
-
LARGE CAPACITY FOR COINS, CASH, AND RECEIPTS-STAY ORGANIZED ON SHIFT!
-
STYLISH, DURABLE PU COVER ADDS ELEGANCE AND COMFORT TO YOUR SERVICE.
-
FITS PERFECTLY IN APRONS; GRAB IT EASILY FOR QUICK ORDER-TAKING!

SQL Server 2025 Unveiled: The AI-Ready Enterprise Database with Microsoft Fabric Integration
Slohif Server Book for Waitress Cute Serving Books with Zipper Pocket Accessories Leather Server Check Book Restaurant Waiter Server Booklet Organizer Ticket Book Holder Lip
- EYE-CATCHING DESIGN ATTRACTS CUSTOMERS AND SHOWCASES YOUR PERSONALITY.
- DURABLE VEGAN LEATHER IS EASY TO CLEAN AND PROTECTS YOUR ESSENTIALS.
- SEVEN ORGANIZED POCKETS MAKE SERVING EFFICIENT AND HASSLE-FREE.
To change the Tomcat port in XAMPP, you need to follow these steps:
- Start by opening the XAMPP control panel on your computer.
- In the control panel, find the "Config" button corresponding to Apache, and click on it. This will open the Apache configuration file in a text editor.
- Look for the line that says "Listen 80" (the default port is usually 80). Change this line to the desired port number for Tomcat. For example, if you want to set the port to 8080, modify the line to "Listen 8080".
- Save the changes you made to the configuration file and close the text editor.
- Now, find the "Config" button corresponding to Tomcat in the XAMPP control panel, and click on it. This will open the Tomcat configuration file in a text editor.
- Look for the line that says "". Change the port number (in this case, 8080) to the same value you set in the Apache configuration file.
- Save the changes you made to the configuration file and close the text editor.
- Restart the Apache and Tomcat servers using the respective "Start" buttons in the XAMPP control panel.
After completing these steps, Tomcat will be running on the new port you specified. Make sure to use the updated port number when accessing the Tomcat server.
How to change the default XAMPP homepage?
To change the default XAMPP homepage, you can follow these steps:
- Open a file explorer and navigate to the XAMPP installation directory. The default installation directory is usually C:\xampp on Windows, /Applications/XAMPP on macOS, or /opt/lampp on Linux.
- In the XAMPP installation directory, locate the htdocs folder. This is where the default XAMPP homepage files are stored.
- Rename the index.php file to something else, for example, index-original.php. This will prevent it from being used as the default homepage.
- Create a new HTML file (e.g., index.html) in the htdocs folder. Edit this file with your preferred content and design to serve as the new homepage.
- You can now access your new homepage by opening a web browser and entering http://localhost or http://127.0.0.1 in the address bar.
Note: If you have multiple websites or projects in the htdocs folder, you can create subfolders for each project and include separate index.html files within those folders. This allows you to access each project individually by accessing http://localhost/project-folder.
How to open the XAMPP control panel?
To open the XAMPP control panel, you can follow these steps:
- Make sure XAMPP is installed on your computer. If it's not, download and install it from the official Apache Friends website.
- Once XAMPP is installed, open the File Explorer (Windows) or Finder (Mac).
- Navigate to the location where XAMPP is installed. The default installation path on Windows is typically "C:\xampp", and on Mac, it's usually "/Applications/XAMPP".
- In the installation folder, you will find the "xampp-control.exe" file on Windows or "xampp-control.app" on Mac. Double-click on this file to run it.
- This will launch the XAMPP Control Panel, which provides an interface to start, stop, and manage various components of XAMPP such as Apache web server, MySQL/MariaDB database server, PHP, etc.
Note: On Mac, you might encounter a security block when trying to open the XAMPP Control Panel for the first time. In that case, go to System Preferences, click on the Security & Privacy icon, and allow the blocked app to run. Then you should be able to open the control panel.
How to change the MySQL port in XAMPP?
To change the MySQL port in XAMPP, follow these steps:
- Open the XAMPP control panel by clicking on the "XAMPP Control" shortcut on your desktop or by navigating to the XAMPP installation directory and running the "xampp-control.exe" file.
- Start the Apache and MySQL modules by clicking on the "Start" button next to each module in the control panel.
- Open the "MySQL Config" file by clicking on the "Config" button for the MySQL module in the control panel.
- In the MySQL configuration file, look for the following line: # The MySQL server [mysqld]
- Below this line, add the following line to specify the new port number (for example, port 3307): port=3307
- Save the changes to the MySQL configuration file and close the text editor.
- Stop the MySQL module in the XAMPP control panel by clicking on the "Stop" button next to it.
- Start the MySQL module again by clicking on the "Start" button next to it. This will apply the new port configuration.
- Verify that the port change was successful by accessing the MySQL database using the new port number. For example, you can use the command line or a MySQL client to connect to "localhost:3307" instead of the default "localhost:3306".
Note: After changing the port, you may need to update any applications or scripts that connect to the MySQL database to use the new port number.
How to backup and restore the XAMPP database?
To backup and restore the XAMPP database, you can follow the steps below:
- Open the XAMPP control panel and make sure the Apache and MySQL servers are running.
- Open a web browser and enter "localhost/phpmyadmin" in the address bar. This will open the phpMyAdmin interface.
- Login with your MySQL username and password. By default, the username is "root" and the password is empty.
- Once logged in, select the database you want to back up from the left-hand panel.
- In the top navigation menu, click on "Export". This will open the export page.
- On the export page, you can choose the format and settings for the backup. The default settings should work in most cases, but you can customize them if needed.
- Click on the "Go" button to start the backup. This will generate a SQL file with the database backup.
- Save the SQL file to a location on your computer. This file contains a backup of your XAMPP database.
To restore the XAMPP database:
- Open the phpMyAdmin interface as described above.
- Select the database where you want to restore the backup from the left-hand panel.
- In the top navigation menu, click on "Import". This will open the import page.
- On the import page, click on the "Choose File" button and select the SQL file you want to restore.
- Once you've selected the file, click on the "Go" button to start the restore process. This will import the SQL file and restore the database.
- After the restore is complete, you should see a success message. Your XAMPP database has now been restored.
Note: It's important to regularly backup your XAMPP database to prevent data loss. You can create a backup schedule or use backup tools to automate the process.
How to start XAMPP as an administrator?
To start XAMPP as an administrator, follow these steps:
- Find the XAMPP icon on your computer desktop or in your Start menu and right-click on it.
- From the context menu, select "Run as administrator". This will open the XAMPP Control Panel with administrative privileges.
- If prompted, click "Yes" or enter the administrator password to confirm the action.
- Once the XAMPP Control Panel opens, you can start the necessary components such as Apache, MySQL, and PHP by clicking the "Start" button next to each module.
Starting XAMPP as an administrator ensures that you have the necessary permissions to manage and start the server and its associated services. This can be useful when you need to modify system-wide configurations or access restricted resources.