
Best Form Creation Tools to Buy in June 2026
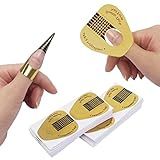
200 PCS Nail Forms for Builder Gel, AHIER Self-adhesive Nail Extension Forms for DIY at Home Professional Nails Art Supplies
- WATERPROOF LAYER ALLOWS MULTIPLE NAIL POLISH APPLICATIONS EFFORTLESSLY.
- 200 ADJUSTABLE NAIL FORMS FIT ALL FINGER SIZES FOR VERSATILE USE.
- IDEAL FOR BOTH PROFESSIONALS AND DIY ENTHUSIASTS TO CREATE STUNNING NAILS.


SUTOKAKA 180Pcs Sandwich Polygel Nail Form Kit 15 Sizes Reusable Almond Nail Extension Mold Builder Gel Dual Forms with Tools for Beginners, No Paper Forms Needed
-
COMPLETE KIT FOR HOME NAIL EXTENSIONS: 180 DUAL FORMS INCLUDED!
-
INNOVATIVE DUAL-FORM DESIGN: FAST, PRECISE, AND FLAWLESS RESULTS!
-
PREMIUM QUALITY: REUSABLE, FLEXIBLE, AND PERFECT FOR ANY NAIL STYLE!

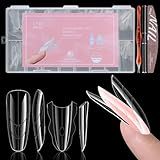
Nail Forms for Builder Gel 100pcs Nail Extension Forms Beautiful for DIY at Home NailForms for Acrylic Nails Create Long Lasting Gel Extensions Professional Nail Art Supplies
-
PERFECT HORSESHOE SHAPE: ENSURES STABLE, COMFORTABLE NAIL SUPPORT.
-
USER-FRIENDLY DESIGN: EASY TO APPLY, PREVENTS GEL LEAKAGE FOR FLAWLESS NAILS.
-
VERSATILE APPLICATIONS: IDEAL FOR VARIOUS NAIL SHAPES AND GEL TECHNIQUES.
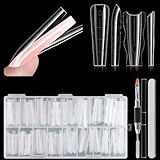
Fcozpjk Sandwich Dual Nail Forms for Builder Gel, 180PCS Nail Forms with Brush Pen File Polygel Extension Tools Kit Top & Bottom Dual Form System Guide Lines Tips Professional Manicure Supply (Coffin)
- EFFORTLESS NAIL EXTENSIONS WITH DUAL FORMS FOR A FLAWLESS FINISH.
- PRE-NUMBERED SIZES AND GUIDE LINES SPEED UP THE NAIL ART PROCESS.
- REUSABLE, STURDY MATERIALS SAVE YOU MONEY AND REDUCE WASTE.
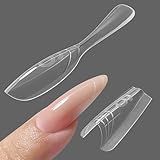
YOKEFELLOW Original Sandwich Nails Dual Forms - 240Pcs Nail Mold for Quick Nails Extension, No Paper Forms Needed, 15 Sizes Plastic Form, Salon Nail Art Tools(W558-Almond)
-
PERFECT NAIL EXTENSIONS: DUAL-FORM DESIGN ENSURES PRECISION EVERY TIME.
-
TIME-SAVING: QUICK APPLICATION ELIMINATES THE NEED FOR PAPER FORMS.
-
PREMIUM QUALITY: DURABLE AND REUSABLE FOR LONG-LASTING, SALON-GRADE RESULTS.

SUPWEE 3D Nail Art Gel Clear and White Solid Builder Gel for Nails Non-Stick Hand Sculpture Hard Gels with Dual Form for Carving Patterns Decoration Nail Art Home Manicure DIY
- CREATE SALON-QUALITY NAILS AT HOME WITH OUR ALL-INCLUSIVE KIT!
- NON-STICKY FORMULA ENSURES EASY, PRECISE APPLICATION & SCULPTING.
- VERSATILE GEL FOR EXTENSIONS, DECORATIONS, AND INNOVATIVE DESIGNS!
Creating a contact form in October CMS involves several steps. Here is a brief overview of the process:
- Install October CMS: First, you need to install October CMS on your server or local environment. Follow the official documentation for installation instructions.
- Create a new Page or Layout: Decide where you want to display your contact form, either on a new page or an existing layout. Create a new page or open the layout file using a code editor.
- Define form fields: Determine the fields you want on your contact form, such as name, email, subject, and message. In your layout or page file, add HTML input elements for each field.
- Add form validation: To ensure the form is properly completed, add validation rules for each field. You can use JavaScript validation or use October CMS's server-side validation.
- Handle form submission: Set up a handler to process the form data when it is submitted. This can be done by creating a new PHP page with a corresponding route that accepts and processes the form data.
- Add mail functionality: To send the submitted form data via email, you can leverage October CMS's built-in mail functionality. Configure your mail settings and create a new mail template.
- Display success or error messages: After the form is submitted, display appropriate success or error messages to the user. You can customize the messages to fit your design and UX requirements.
- Style your form: Finally, style the form and its elements using CSS to match your website's design and layout.
Remember to refer to the official October CMS documentation, as it provides more detailed information and examples for each step.
How to configure SMTP settings in October CMS?
To configure SMTP (Simple Mail Transfer Protocol) settings in October CMS, you can follow these steps:
- Log in to your October CMS backend.
- Click on the "Settings" tab from the top menu.
- In the left sidebar, click on "Mail Configuration" under the "Miscellaneous" section.
- On the "Mail Configuration" page, you will find various options for configuring the SMTP settings.
- "Driver" field: Select "smtp" from the dropdown list.
- "Host" field: Enter the SMTP server hostname or IP address.
- "Port" field: Enter the SMTP server port number. The default port for SMTP is 25, but if you are using SSL/TLS encryption, the port could be different (e.g., 465 or 587).
- "Encryption" field: Select the encryption type you want to use, such as "SSL" or "TLS." This depends on the requirements of your SMTP server.
- "Username" field: Enter the username for authenticating with the SMTP server (if required).
- "Password" field: Enter the password for the SMTP server authentication (if required).
- "Sender email address" field: Enter the email address from which the outgoing emails will be sent.
- "Sender name" field: Enter the name associated with the sender email address.
- Once you have filled in the SMTP settings, click the "Save" button at the top right corner of the page.
After saving the configuration, October CMS will use the specified SMTP settings for sending emails from your application.
What is October CMS?
October CMS is a content management system (CMS) built on the Laravel PHP framework. It is an open-source platform designed for web developers to create and manage websites with ease. October CMS provides a robust set of features including a user-friendly interface, flexible templating system, powerful CMS tools, and extensive plugins and themes. It aims to simplify the process of building and maintaining websites, allowing developers to focus on customization and functionality.
How to include a subject field in October CMS contact form?
To include a subject field in a contact form for October CMS, you can follow these steps:
- Open the October CMS admin panel and navigate to the "RainLab.Pages" plugin.
- Create a new page or edit an existing one that will contain the contact form.
- In the CMS editor, add a form component to your page. You can find the form component in the list of available components.
- Customize the form fields as needed, including adding a text input field for the subject.
- To add the subject field and make it required, you can add the following code to the CMS editor: fields: subject: label: Subject type: text required: true This adds a new subject field to your form component with a label "Subject" and makes it a required field.
- Save and close the CMS editor.
- In your October CMS project directory, locate the corresponding page template file for the page you edited.
- Open the template file and find the section that renders the form component.
- Update the section code to include the subject field. For example: function onStart() { $this['subject'] = post('subject'); } This code adds the subject field to the form data that will be sent when the form is submitted.
- Modify your form HTML code to include the subject field. For example:
Subject:
This adds an input field for the subject, with the subject variable being passed as the value of the input field.
- Save the template file.
- Test your contact form to ensure the subject field is now included and required when submitting the form.
By following these steps, you should be able to include a subject field in a contact form for your October CMS website.
What is a success message after form submission?
A success message after form submission is a confirmation message that indicates that the form has been successfully submitted. It often includes a positive and reassuring tone, acknowledging the completion of the form and providing any relevant information or next steps. This message reassures the user that their input has been successfully recorded and may also provide a reference number or a way to track the submission if applicable.
What are form notifications in October CMS?
Form notifications in October CMS are notifications that can be sent to a specified email address whenever a user submits a form on a website built with October CMS. These notifications can be used to alert the website owner or administrators about form submissions and provide them with the submitted form data. They can be configured to include custom email templates, allowing for personalized and informative notifications. Form notifications are a useful feature for keeping track of user interactions and ensuring prompt response to form submissions.