
Best File Upload Solutions in CodeIgniter to Buy in June 2026

FOXWELL NT301 OBD2 Scanner Live Data Professional Mechanic OBDII Diagnostic Code Reader Tool for Check Engine Light
-
READ & RESET DTCS EASILY: CLEAR CHECK ENGINE LIGHTS POST-REPAIR FOR PEACE OF MIND.
-
LIVE DATA & GRAPHING: MONITOR VEHICLE PERFORMANCE IN REAL-TIME FOR ACCURATE DIAGNOSTICS.
-
PLUG & PLAY CONVENIENCE: NO BATTERY NEEDED; GETS POWER FROM YOUR VEHICLE’S OBD2 PORT.


FOXWELL NT201 OBD2 Scanner Code Reader for Cars and Trucks - Reset Check Engine Light, Read and Clear Fault Codes, Live Data Diagnostic Tool for All Cars Since 1996
-
QUICKLY READ & CLEAR FAULT CODES: SAVE ON MECHANIC VISITS!
-
LIVE DATA ANALYSIS: IDENTIFY ENGINE ISSUES WITH REAL-TIME INSIGHTS.
-
ONE-KEY EMISSIONS TEST: EASY PRE-INSPECTION CHECKS, NO HASSLE!

XTOOL D5 Car Code Reader and Reset Tool, Engine ABS SRS Transmission Car Diagnostic Tool with EPB Service, ABS Bleed, Throttle Relearn, Clear Check Engine Light Code Reader with 10 Resets, Free Update
- USER-FRIENDLY INTERFACE WITH ONE-TOUCH OPERATION SIMPLIFIES DIAGNOSTICS.
- COVERS 90+ VEHICLE BRANDS, ENSURING WIDE COMPATIBILITY FOR USERS.
- FREE LIFETIME WI-FI UPDATES MEAN NO HIDDEN FEES OR SUBSCRIPTIONS.
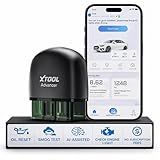
XTOOL Advancer AD20 Pro AI-Assisted Wireless OBD2 Scanner Diagnostic Tool, Car Code Reader for iPhone&Android, All System Scan Tool with Free Updates -Check Engine, Oil Reset, Performance/Battery Test
-
NO SUBSCRIPTIONS: SCAN UNLIMITED VEHICLES WITH FREE LIFETIME UPDATES!
-
AI DIAGNOSTICS: GET REAL-TIME REPAIR ADVICE IN PLAIN ENGLISH!
-
FULL SYSTEM ACCESS: COMPLETE DIAGNOSTICS FOR 85+ GLOBAL VEHICLE BRANDS!

Docker para CodeIgniter 4 e PHP: Práticas Seguras, Documentação Automática e Casos de Uso (Portuguese Edition)
To upload a file in CodeIgniter framework, you need to follow the below steps:
- First, make sure you have configured your CodeIgniter framework properly, including database configuration and other necessary settings.
- Create a form view for file upload using the form_open_multipart() function. This function sets the form's enctype to "multipart/form-data" to handle file uploads. Example:
- Create a controller method to handle the file upload. In this method, you can access the uploaded file using the $_FILES superglobal variable. Example:
public function upload() { if($this->input->post('submit')) { $config['upload_path'] = './uploads/'; $config['allowed_types'] = 'gif|jpg|png';
    $this->load->library('upload', $config);

    if (!$this->upload->do\_upload('file\_name')) {
        $error = $this->upload->display\_errors();
        // handle the upload error here
    } else {
        $data = $this->upload->data();
        // process the uploaded file here
    }
}
}
The $config['upload_path'] specifies the directory where you want to save the uploaded files. The $config['allowed_types'] specifies the types of files allowed to be uploaded.
- Finally, make sure to load the upload library using $this->load->library('upload', $config); and call the do_upload() function to actually perform the file upload. If the upload is successful, you can access the uploaded file information using $this->upload->data().
Note: Don't forget to set appropriate file and folder permissions to allow the code to upload and save files to the specified directory.
That's a brief overview of how to upload a file in CodeIgniter framework.
How to limit the maximum file size for file uploads in CodeIgniter?
To limit the maximum file size for file uploads in CodeIgniter, you can use the following steps:
- Open the php.ini file on your server. This file is usually located in the PHP installation directory.
- Search for the upload_max_filesize directive in this file. This directive determines the maximum allowed size for uploaded files. You can change its value to the desired maximum file size. For example, if you want to limit the file size to 2MB, you can set it as upload_max_filesize = 2M.
- Similarly, search for the post_max_size directive in the php.ini file. This directive determines the maximum size of POST data that PHP will accept. You should set this value larger than the upload_max_filesize to allow for additional POST data. For example, if you set the upload_max_filesize to 2MB, you can set the post_max_size as post_max_size = 3M.
- Save the php.ini file and restart your web server to apply the changes.
- In CodeIgniter, you can further limit the file size during the file upload process. In your controller or wherever you handle the file upload, you can use the upload library to set additional checks. Here is an example:
$config['upload_path'] = './uploads/'; $config['allowed_types'] = 'gif|jpg|png'; $config['max_size'] = '2048'; // in kilobytes
$this->load->library('upload', $config);
if (!$this->upload->do_upload('file')) { // File upload failed, handle the error $error = $this->upload->display_errors(); echo $error; } else { // File upload successful, continue processing $data = $this->upload->data(); // Rest of your code }
In the above example, we set the max_size option of the upload configuration to limit the file size to 2MB. If the uploaded file exceeds this limit, the upload will fail, and you can handle the error accordingly.
Remember to adjust the allowed file types (allowed_types) and the upload path (upload_path) according to your specific requirements.
What is the file upload library in CodeIgniter?
The file upload library in CodeIgniter is called "upload." It is a built-in library that provides various methods and functions for handling file uploads. This library allows you to validate and manage uploaded files, such as checking file size, file type, and renaming the file. It also provides options for handling errors during the file upload process.
How to restrict file uploads to specific file types in CodeIgniter?
To restrict file uploads to specific file types in CodeIgniter, you can use the allowed_types configuration option in the upload library. Here are the steps to implement this:
- Load the upload library in your controller or autoload it in the configuration file:
$this->load->library('upload');
- Set the allowed_types configuration option for the upload library with the desired file types in your controller method:
$config['allowed_types'] = 'jpg|png|gif|pdf'; // Specify the allowed file types here $this->upload->initialize($config);
- Then, you can process the file upload as usual using the do_upload() method:
if ($this->upload->do_upload('file_input_name')) { // File uploaded successfully } else { $error = $this->upload->display_errors(); // Handle the upload error }
Make sure to replace file_input_name with the actual input name of your file upload input field.
By setting the allowed_types configuration option, CodeIgniter will automatically validate the file type during the upload process and only allow the specified file types.