
Best Tools for Server Management to Buy in June 2026
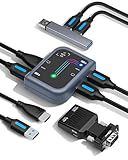
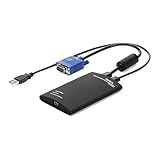
IT-Guy.IO ServerConnect Pro Portable Server Management Tool: USB Crash Cart Adapter – 1920 x 1200 – Portable Laptop USB 2.0 to KVM Console - Datacenter Server Monitor Mouse and Keyboard to USB
-
TRANSFORM LAPTOPS INTO SERVER MANAGEMENT TOOLS ON THE GO.
-
NO DRIVER INSTALLATION NEEDED; CONNECT EASILY WITH ANY SERVER.
-
COMPACT DESIGN WITH FULL BIOS CONTROL FOR EFFICIENT REMOTE ACCESS.


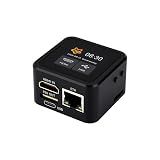
Luckfox PicoKVM Lightweight IP KVM Remote Management Tool, Supports 1920 × 1080@60fps HDMI Video Input and HID Signal Output for Device Control, with Case and 1.54inch Touch Display
- HDMI INPUT FOR SEAMLESS VIDEO CAPTURE FROM PC DISPLAYS.
- USB PORT SIMULATES MOUSE/KEYBOARD, ENHANCING DEVICE VERSATILITY.
- 1.54 TOUCH DISPLAY FOR REAL-TIME STATUS UPDATES AND MANAGEMENT.
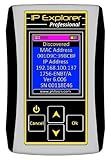
Ethernet IP Address Explorer DHCP and Bootp Server
- FAST IP ASSIGNMENT FOR SEAMLESS INDUSTRIAL DEVICE CONNECTIVITY.
- COMPATIBLE WITH PLCS, SWITCHES, AND I/O ADAPTERS FOR VERSATILE USE.
- RELIABLE DHCP AND BOOTP SERVER BOOSTS NETWORK EFFICIENCY.
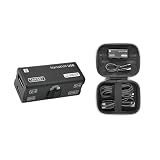
Sipeed NanoKVM-USB Operations Maintenance Server Tool Kit, Multi-Device Collaboration, Finger-sized 4K USB KVM for Server SBCs, USB A Switcher 1080P Video Capturer, 4K HDMI IN/Loop Out (KVM Full Kit1)
- PORTABLE MULTI-DEVICE SUPPORT: OPERATE WITHOUT A KEYBOARD OR MOUSE ANYWHERE.
- 1080P CAPTURING READY: STREAM HIGH-QUALITY VIDEO SIGNALS VIA USB 3.0.
- USER-FRIENDLY SDK ACCESS: EASY INTEGRATION WITH COMPREHENSIVE DOCUMENTATION.
StarTech.com Portable Laptop Crash Cart Adapter for Server Management, USB/VGA KVM Console, Windows/Linux/MacOS - TAA
- TRANSFORM YOUR LAPTOP INTO A PORTABLE CONSOLE FOR EASY SERVER ACCESS.
- LOG SERVER ACTIVITY EFFORTLESSLY WITH USER-FRIENDLY CRASH CART SOFTWARE.
- COMPACT, SELF-POWERED DESIGN ELIMINATES THE NEED FOR BULKY CRASH CARTS.

Crumb Sweepers, Restaurant Crumbers for Servers, Stainless Steel Crumb Scraper, Table Crumber Tool for Waiters, Waitresses and Servers, Crumber for Server, Waitress Accessories (2 PACK, Black)
- EFFORTLESSLY CLEAN TABLES WITH OUR DURABLE STAINLESS STEEL CRUMB SWEEPER.
- COMPACT DESIGN WITH A SECURE CLIP FOR QUICK ACCESS AND EASY STORAGE.
- PERFECT FOR SERVERS: LIGHTWEIGHT, PRACTICAL, AND BUILT TO LAST FOR DAILY USE.

VELCRO Brand Heavy Duty Cable Ties Reusable | 60Pc Bulk Pack | 8 x 1/2" ONE-WRAP Straps, Black | Strong Wire Management | Cord Bundling for Home Office and Data Centers
-
ECO-FRIENDLY CHOICE: REUSABLE TIES REDUCE WASTE WHILE ORGANIZING CORDS.
-
VERSATILE STORAGE: EASILY MANAGE AND SECURE VARIOUS CABLES AND WIRES.
-
USER-FRIENDLY DESIGN: QUICK, ADJUSTABLE, AND SELF-FASTENING FOR CONVENIENCE.
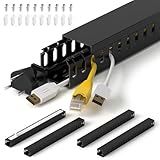
ZhiYo H1.4 W1.6in Professional Server Rack Cable Management Raceway, 66in (4X L16.5in) Cable Raceway Kit, Electrically Safe PVC Open Slot Wire Raceway for Under Desk/Computer/Network Cords, Black
-
ACCOMMODATES 20 CABLES, PERFECT FOR HOME OR OFFICE SETUPS!
-
EASY INSTALLATION WITH SCREWS AND FOAM STRIPS ENSURES CONVENIENCE!
-
DURABLE, FLAME-RETARDANT DESIGN FOR SAFE, EFFICIENT CABLE MANAGEMENT!
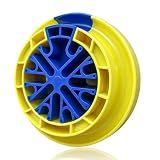
Foycow 48-Way Wire Management Tool - Cable Organizer for Neat Installation - Compatible with Wires up to 0.25" Diameter
- BROAD COMPATIBILITY: SUPPORTS VARIOUS CABLES, UP TO 48 AT ONCE!
- SPACE-SAVING DESIGN: NEATLY ORGANIZES CABLES IN A COMPACT FOOTPRINT.
- DURABLE & ERGONOMIC: BUILT TO LAST WITH EASY, COMFORTABLE HANDLING.
To change the default root directory in XAMPP, you need to follow these steps:
- Locate the XAMPP installation folder on your computer. By default, it is usually installed in the "C:\xampp" directory on Windows.
- Go to the "C:\xampp\apache\conf" folder and find the "httpd.conf" file. This file contains the configuration settings for the Apache web server.
- Open the "httpd.conf" file with a text editor (e.g., Notepad, Sublime Text).
- Inside the file, search for the line that begins with "DocumentRoot" and specifies the default root directory. By default, it is set to "C:/xampp/htdocs".
- Change the path after "DocumentRoot" to the desired directory where you want your root web folder to be located. For example, if you want to set it to "D:/MyWebsite", modify the line to "DocumentRoot "D:/MyWebsite"".
- Next, locate the line that begins with ":/xampp/htdocs">").
- Change the path mentioned in the "" section to match the new root directory you set in step 5. For instance, if you set the root directory to "D:/MyWebsite", the updated line will be "".
- Save the changes to the "httpd.conf" file and close it.
- Restart the Apache web server in XAMPP to apply the modifications. You can do this by opening the XAMPP Control Panel, clicking on the "Stop" button next to "Apache", and then clicking on the "Start" button to re-launch it.
After following these steps, the root directory for localhost on XAMPP will be changed to your desired location, allowing you to store and access your web files from the newly defined directory.
How to revert back to the default root directory in XAMPP?
To revert back to the default root directory in XAMPP, you need to follow these steps:
- Open the XAMPP control panel.
- Stop the Apache server by clicking on the "Stop" button.
- Open the XAMPP installation directory (usually located in "C:\xampp" on Windows or "/Applications/XAMPP" on macOS).
- Locate the "httpd.conf" file in the "apache\conf" subdirectory.
- Open the "httpd.conf" file in a text editor.
- Search for the line that starts with "DocumentRoot" and modify the path to the default root directory. The default root directory in XAMPP is typically "htdocs" or "www" in the XAMPP installation directory.
- Save the changes to the "httpd.conf" file.
- Start the Apache server by clicking on the "Start" button in the XAMPP control panel.
- Your XAMPP server should now be using the default root directory as specified in the "httpd.conf" file.
What is the role of the httpd.conf file in XAMPP?
The httpd.conf file in XAMPP is the main configuration file for the Apache server. It is responsible for setting up and configuring various aspects of the server, such as the server's port, virtual hosts, directory settings, access control, and other modules.
In the httpd.conf file, you can specify the server's document root, which is the directory where the server looks for web files by default. You can also define virtual hosts to host multiple websites on the same server, each with its own configurations.
Additionally, the httpd.conf file allows you to configure various modules and features of the server, such as enabling or disabling certain modules, configuring server logging, enabling compression, setting cache directives, and more.
Therefore, the httpd.conf file plays a vital role in defining the behavior and functionality of the Apache server in XAMPP. It is essential for customizing and fine-tuning the server's settings according to specific requirements.
How to change the default port for Apache in XAMPP?
To change the default port for Apache in XAMPP, you need to follow these steps:
- Open XAMPP control panel.
- Stop the Apache server if it is already running.
- Navigate to the XAMPP installation directory on your computer. By default, it is installed in "C:\xampp".
- Go to the "apache" folder and then open the "conf" folder.
- Locate the "httpd.conf" file and open it in a text editor (e.g., Notepad).
- Search for the line containing "Listen 80". This line specifies the default port number.
- Change the port number from "80" to the desired port number (e.g., 8080).
- Search for the line containing "ServerName localhost:80" and change the port number from "80" to the same port number you used in the previous step (e.g., 8080).
- Save the changes and close the file.
- Open XAMPP control panel again.
- Start the Apache server.
Apache should now be running on the new port that you have specified.
What are the steps to modify XAMPP's default root folder?
To modify XAMPP's default root folder, you can follow these steps:
- Locate the XAMPP installation directory. By default, it is installed in "C:\xampp" on Windows and "/Applications/XAMPP" on macOS.
- Open the XAMPP Control Panel and stop all the services that are running, such as Apache and MySQL.
- Navigate to the XAMPP installation directory and find the "httpd.conf" file. It is typically located in the "apache\conf" subdirectory.
- Open the "httpd.conf" file in a text editor.
- Search for the following line: DocumentRoot "C:/xampp/htdocs" This line defines the default root folder. Update the path within the quotation marks to the desired root folder on your system.
- Search for the following line: Update the path within the quotation marks to match the new root folder path you set in step 5.
- Save the changes to the "httpd.conf" file and close the text editor.
- Go back to the XAMPP Control Panel and start the Apache service.
- Open your web browser and visit "http://localhost" to see if the changes have taken effect. It should now display the contents of the new root folder you specified.
What is XAMPP and what is it used for?
XAMPP is an open-source, cross-platform web server solution that stands for "X" (referring to any operating system), Apache HTTP Server, MySQL/MariaDB database, PHP, and Perl. It is a popular tool used for web development and testing purposes.
XAMPP bundles all the necessary components and software required to run a web server locally, making it easy for developers to set up a local development environment. It includes Apache as the web server, MySQL/MariaDB as the database server, PHP for server-side scripting, and Perl as a programming language.
XAMPP is commonly used during the development and testing stages of website creation. It allows developers to work on their websites or web applications offline before deploying them to a live server. Additionally, XAMPP provides a user-friendly interface to manage and configure these server components, making it easier to test and debug websites locally.
Overall, XAMPP provides a convenient and simple way for developers to create and test web applications locally without the need for online hosting.